
Jess Buckley, Staff Writer
With the first month of classes wrapping up and the last of our move-in boxes finally unpacked, the welcome chill of autumn has finally come knocking. Why not welcome the return of hoodies and pumpkin spice lattes with a little extra flair? You’re just one craft store trip away from creating a totally fun and festive wreath, just bursting with autumnal vibes.
For under $15 and two hours time, your door will be sporting new digs that will have all your floor mates thinking you’re a creative genius.
 Supplies:
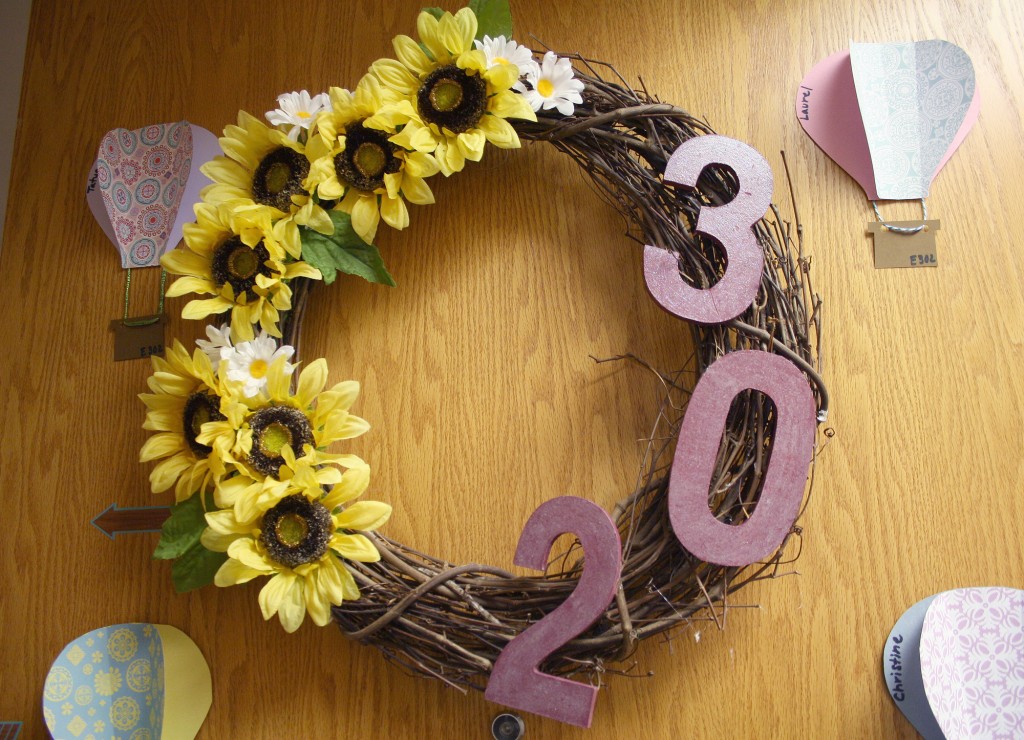
- An unfinished grapevine wreath.
- Wooden or chipboard numbers or letters.
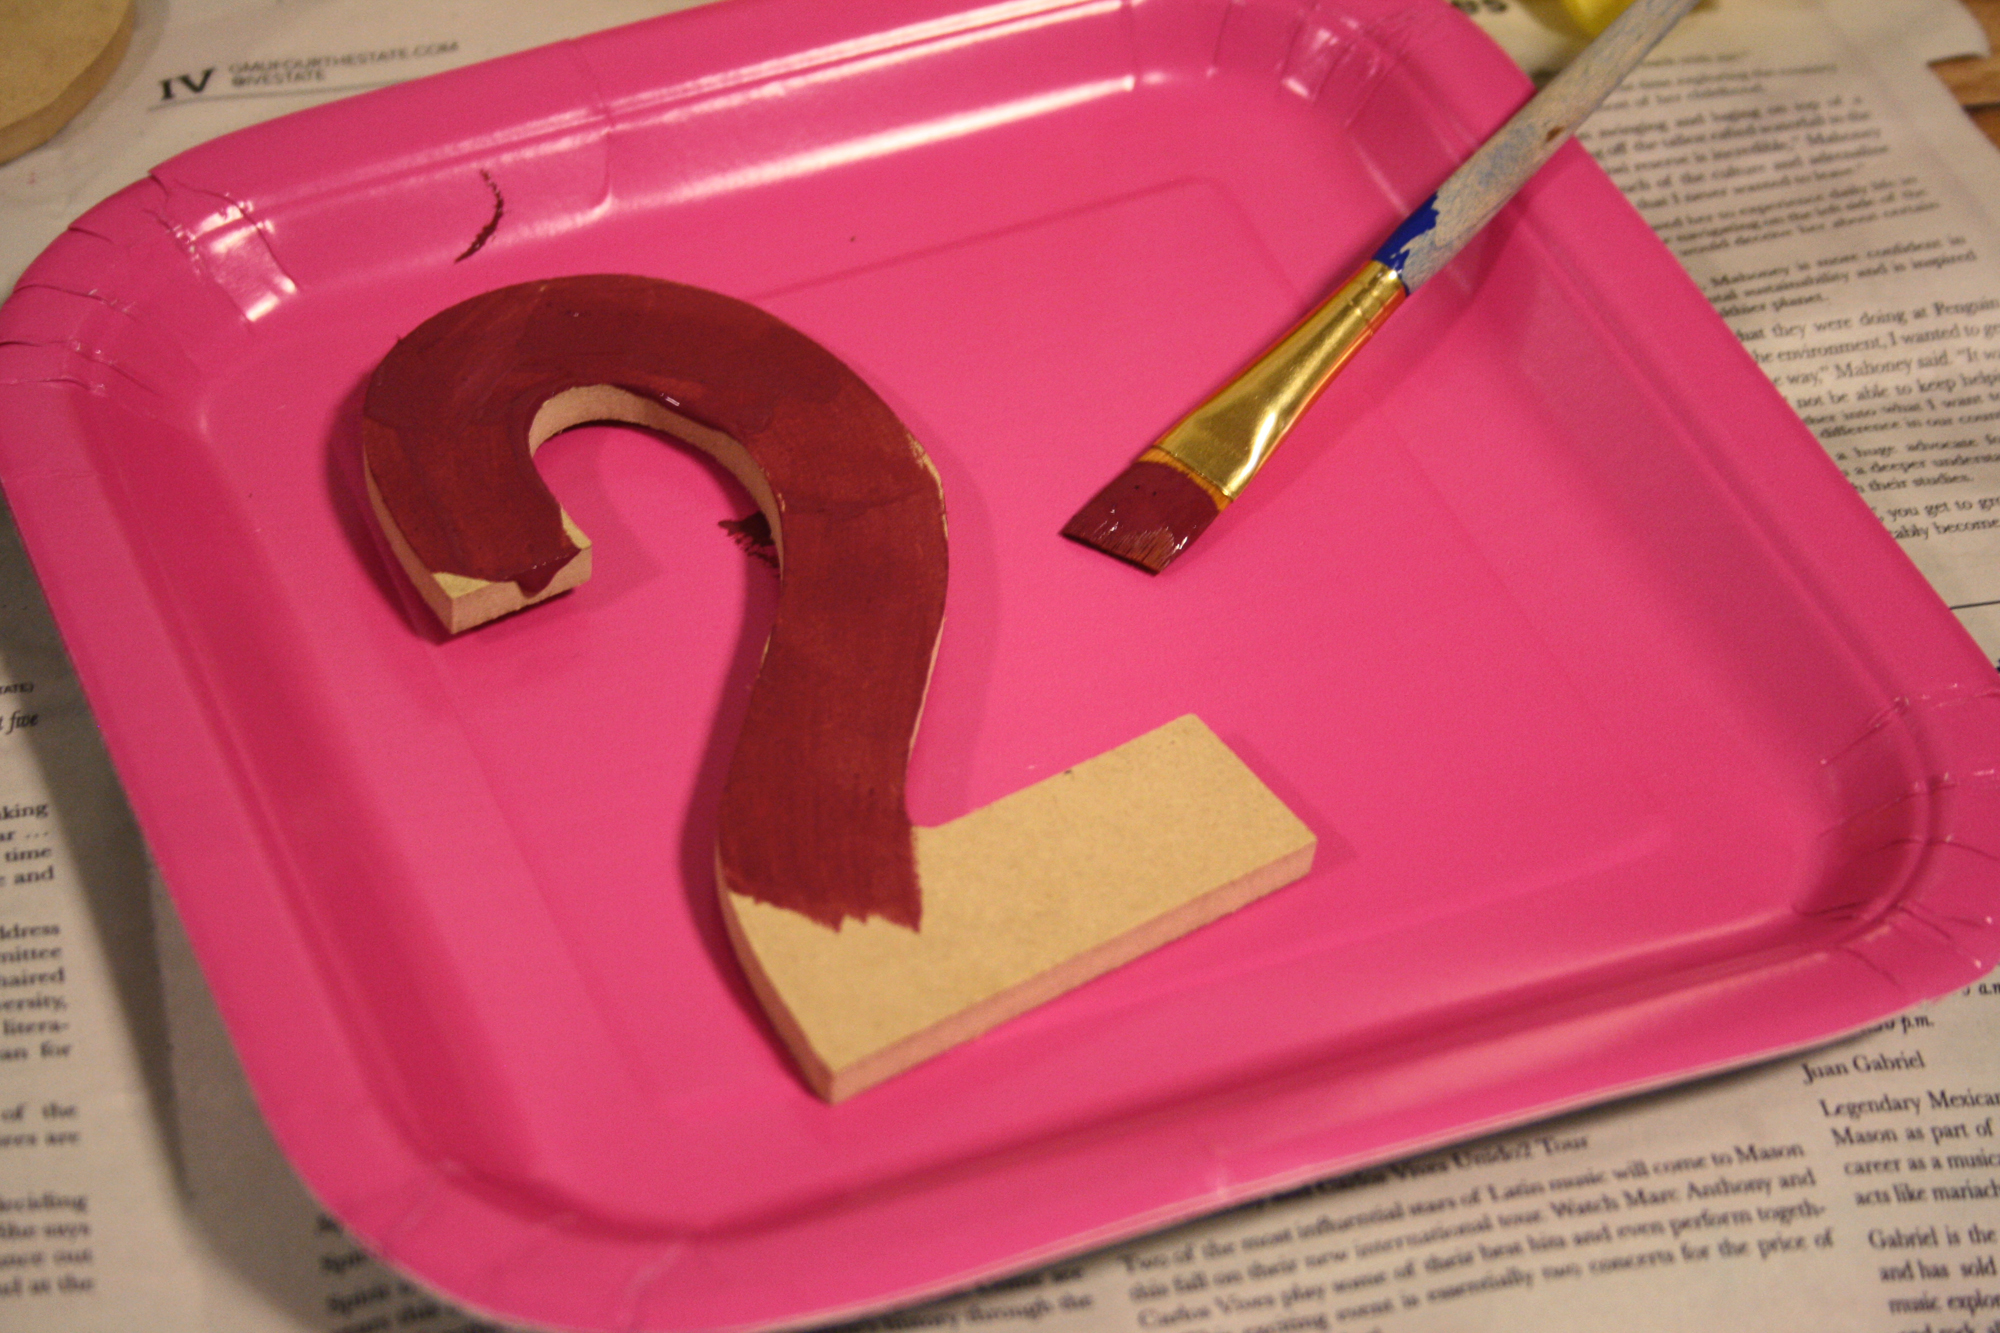
- Paints in your choice of colors.
- Paint brushes.
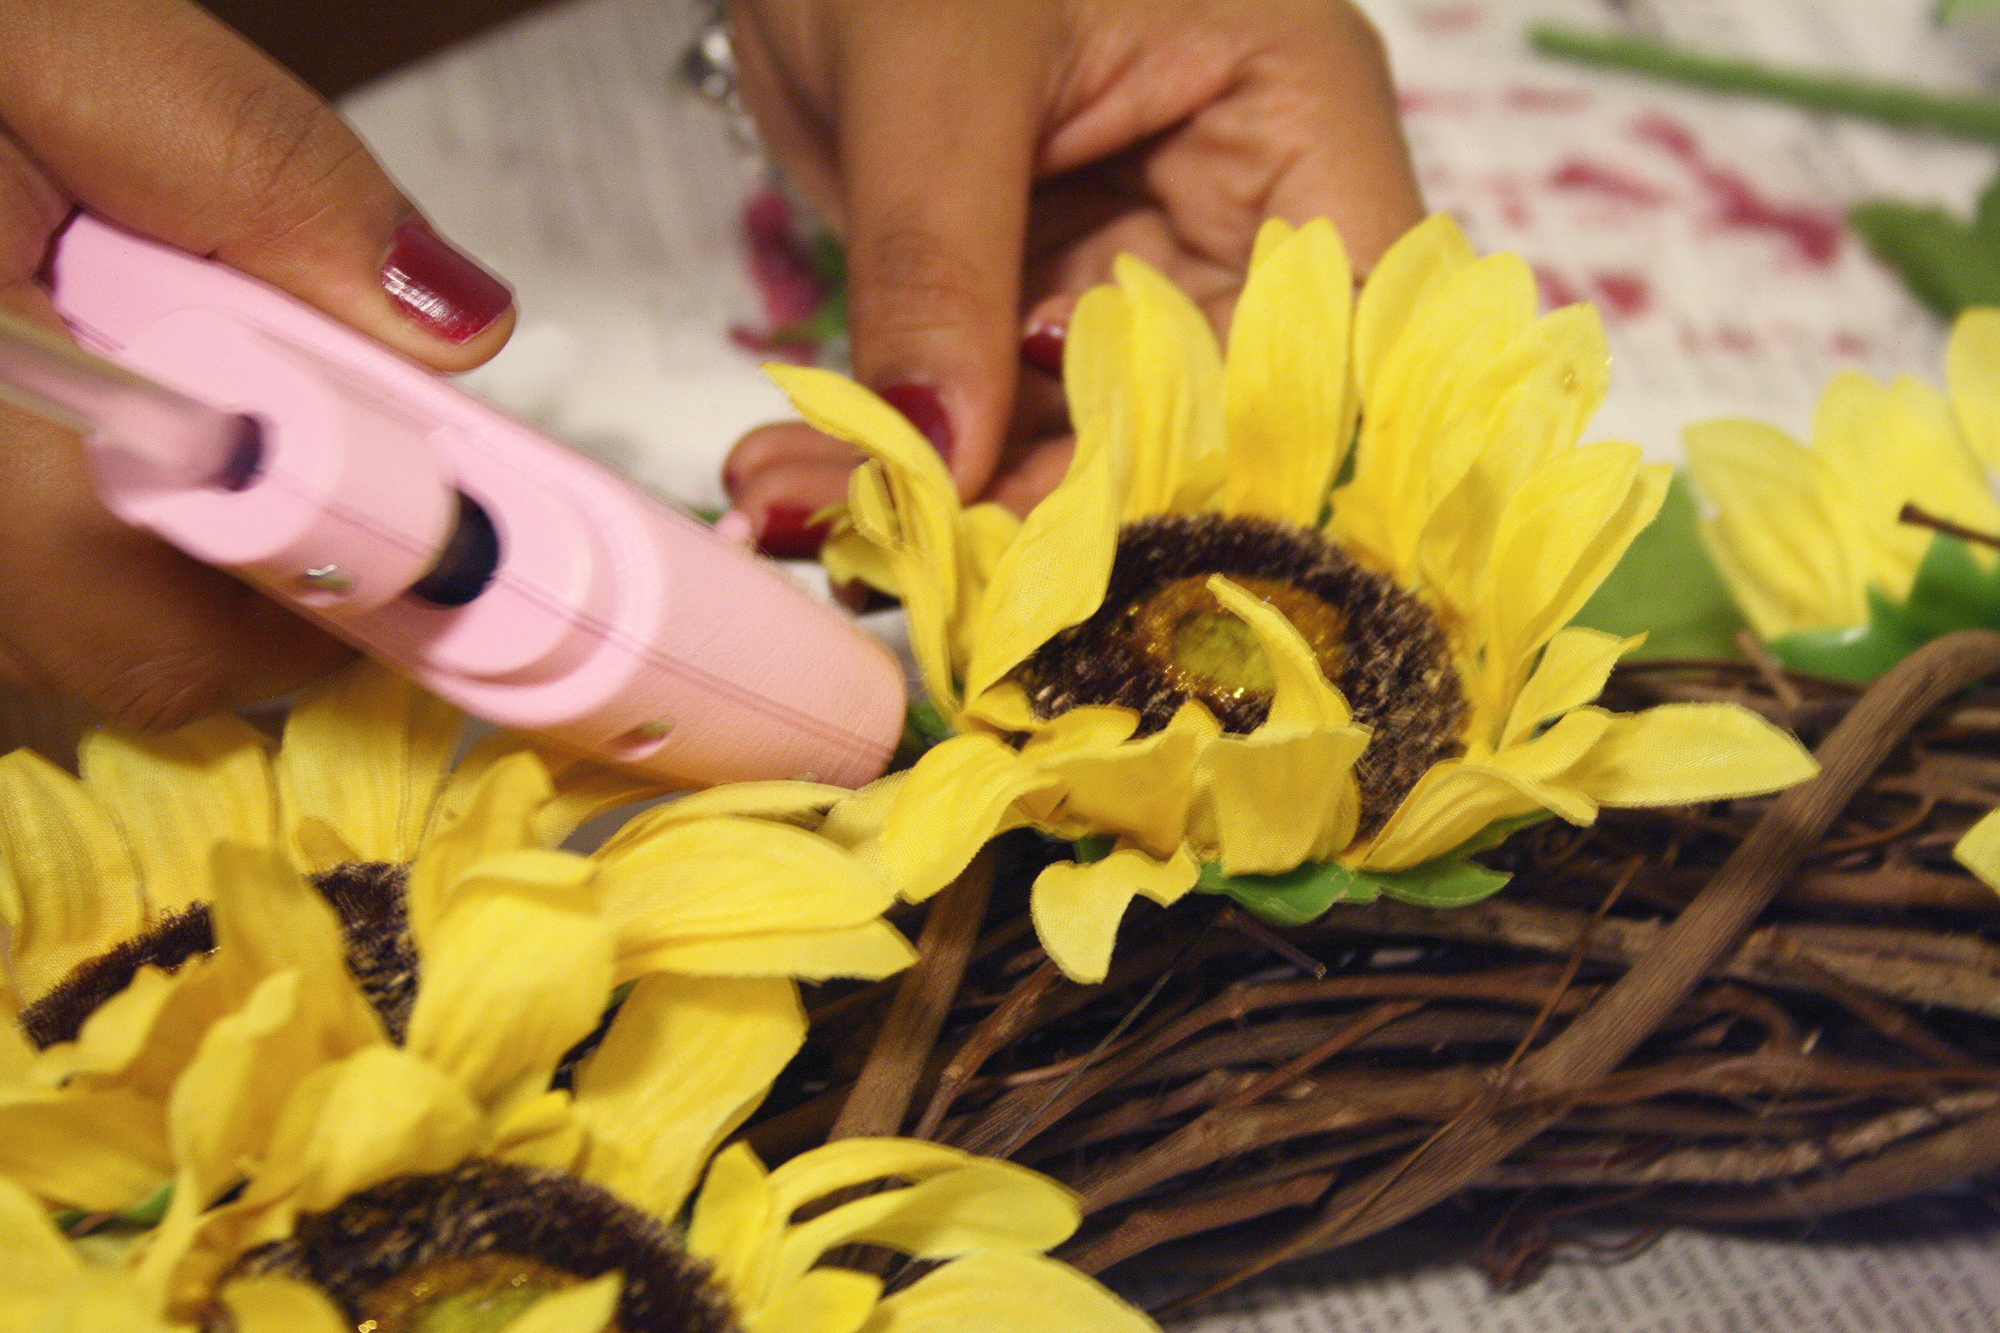
- A hot glue gun (and a ton of glue sticks!)
- Floral wire.
- Synthetic flowers and foliage of your choice.
- A command hook.
Step 1:
Cut the stems off the flowers and arrange them, along with the wooden numbers, on your wreath. This will help you visualize what the finished product will look like, as well as establish the placement of the embellishments for you as you’re working.
Step 2:
Paint your numbers and give them ample time to dry. You can also seal them with a coat of mod podge or glitter topcoat, but this is completely optional. Remember to plug in your hot glue gun so it’s ready for the next step!
Step 3:
Measure and cut about a foot of floral wire for each of your wooden numbers. This will be used to fasten the number to the wreath and hold it in place. Use your hot glue gun to secure the floral wire to the back of your numbers. Be sure to hold the wire flush with the wood so it stays in place until the glue dries. You may need the help of a friend for this step.
Step 4:
Once the glue is completely dry, wrap the floral wire around the wreath and twist until secure. For extra stability, weave some of the wire through the branches of the wreath. Cut off any excess that may remain. Repeat this step for as many numbers or letters you used, until all of them are securely fastened to the wreath.
Step 5:
When you’re sure of the way you’d like to arrange your flowers, you can begin gluing them. Be sure to apply enough glue to the back of the flower, and press down until the flower feels like it’s staying in place. Repeat with all your flowers until you accomplish your desired look.
Step 6:
Step back and look at your wreath from a new perspective. Decide if you’d like to add a few leaves, or maybe another flower. Once you’re happy with it, pat yourself on the back! You did it!

Step 7:
Cut another piece of floral wire and string it through the top. Form a loop and make sure the wreath can safely hang from it. Next, apply the command hook to the door and slip the loop through it. Viola! You’ve successfully completed your wreath. Time to show off your hard work on Instagram and hashtag it with #fourthestateDIY
This project is perfect for adding a little more pizzazz to your door, as well as making your dorm feel even more like home!